Tag Archives: recipes

Home-Canned Taco/Enchilada Sauce

IMG_7864

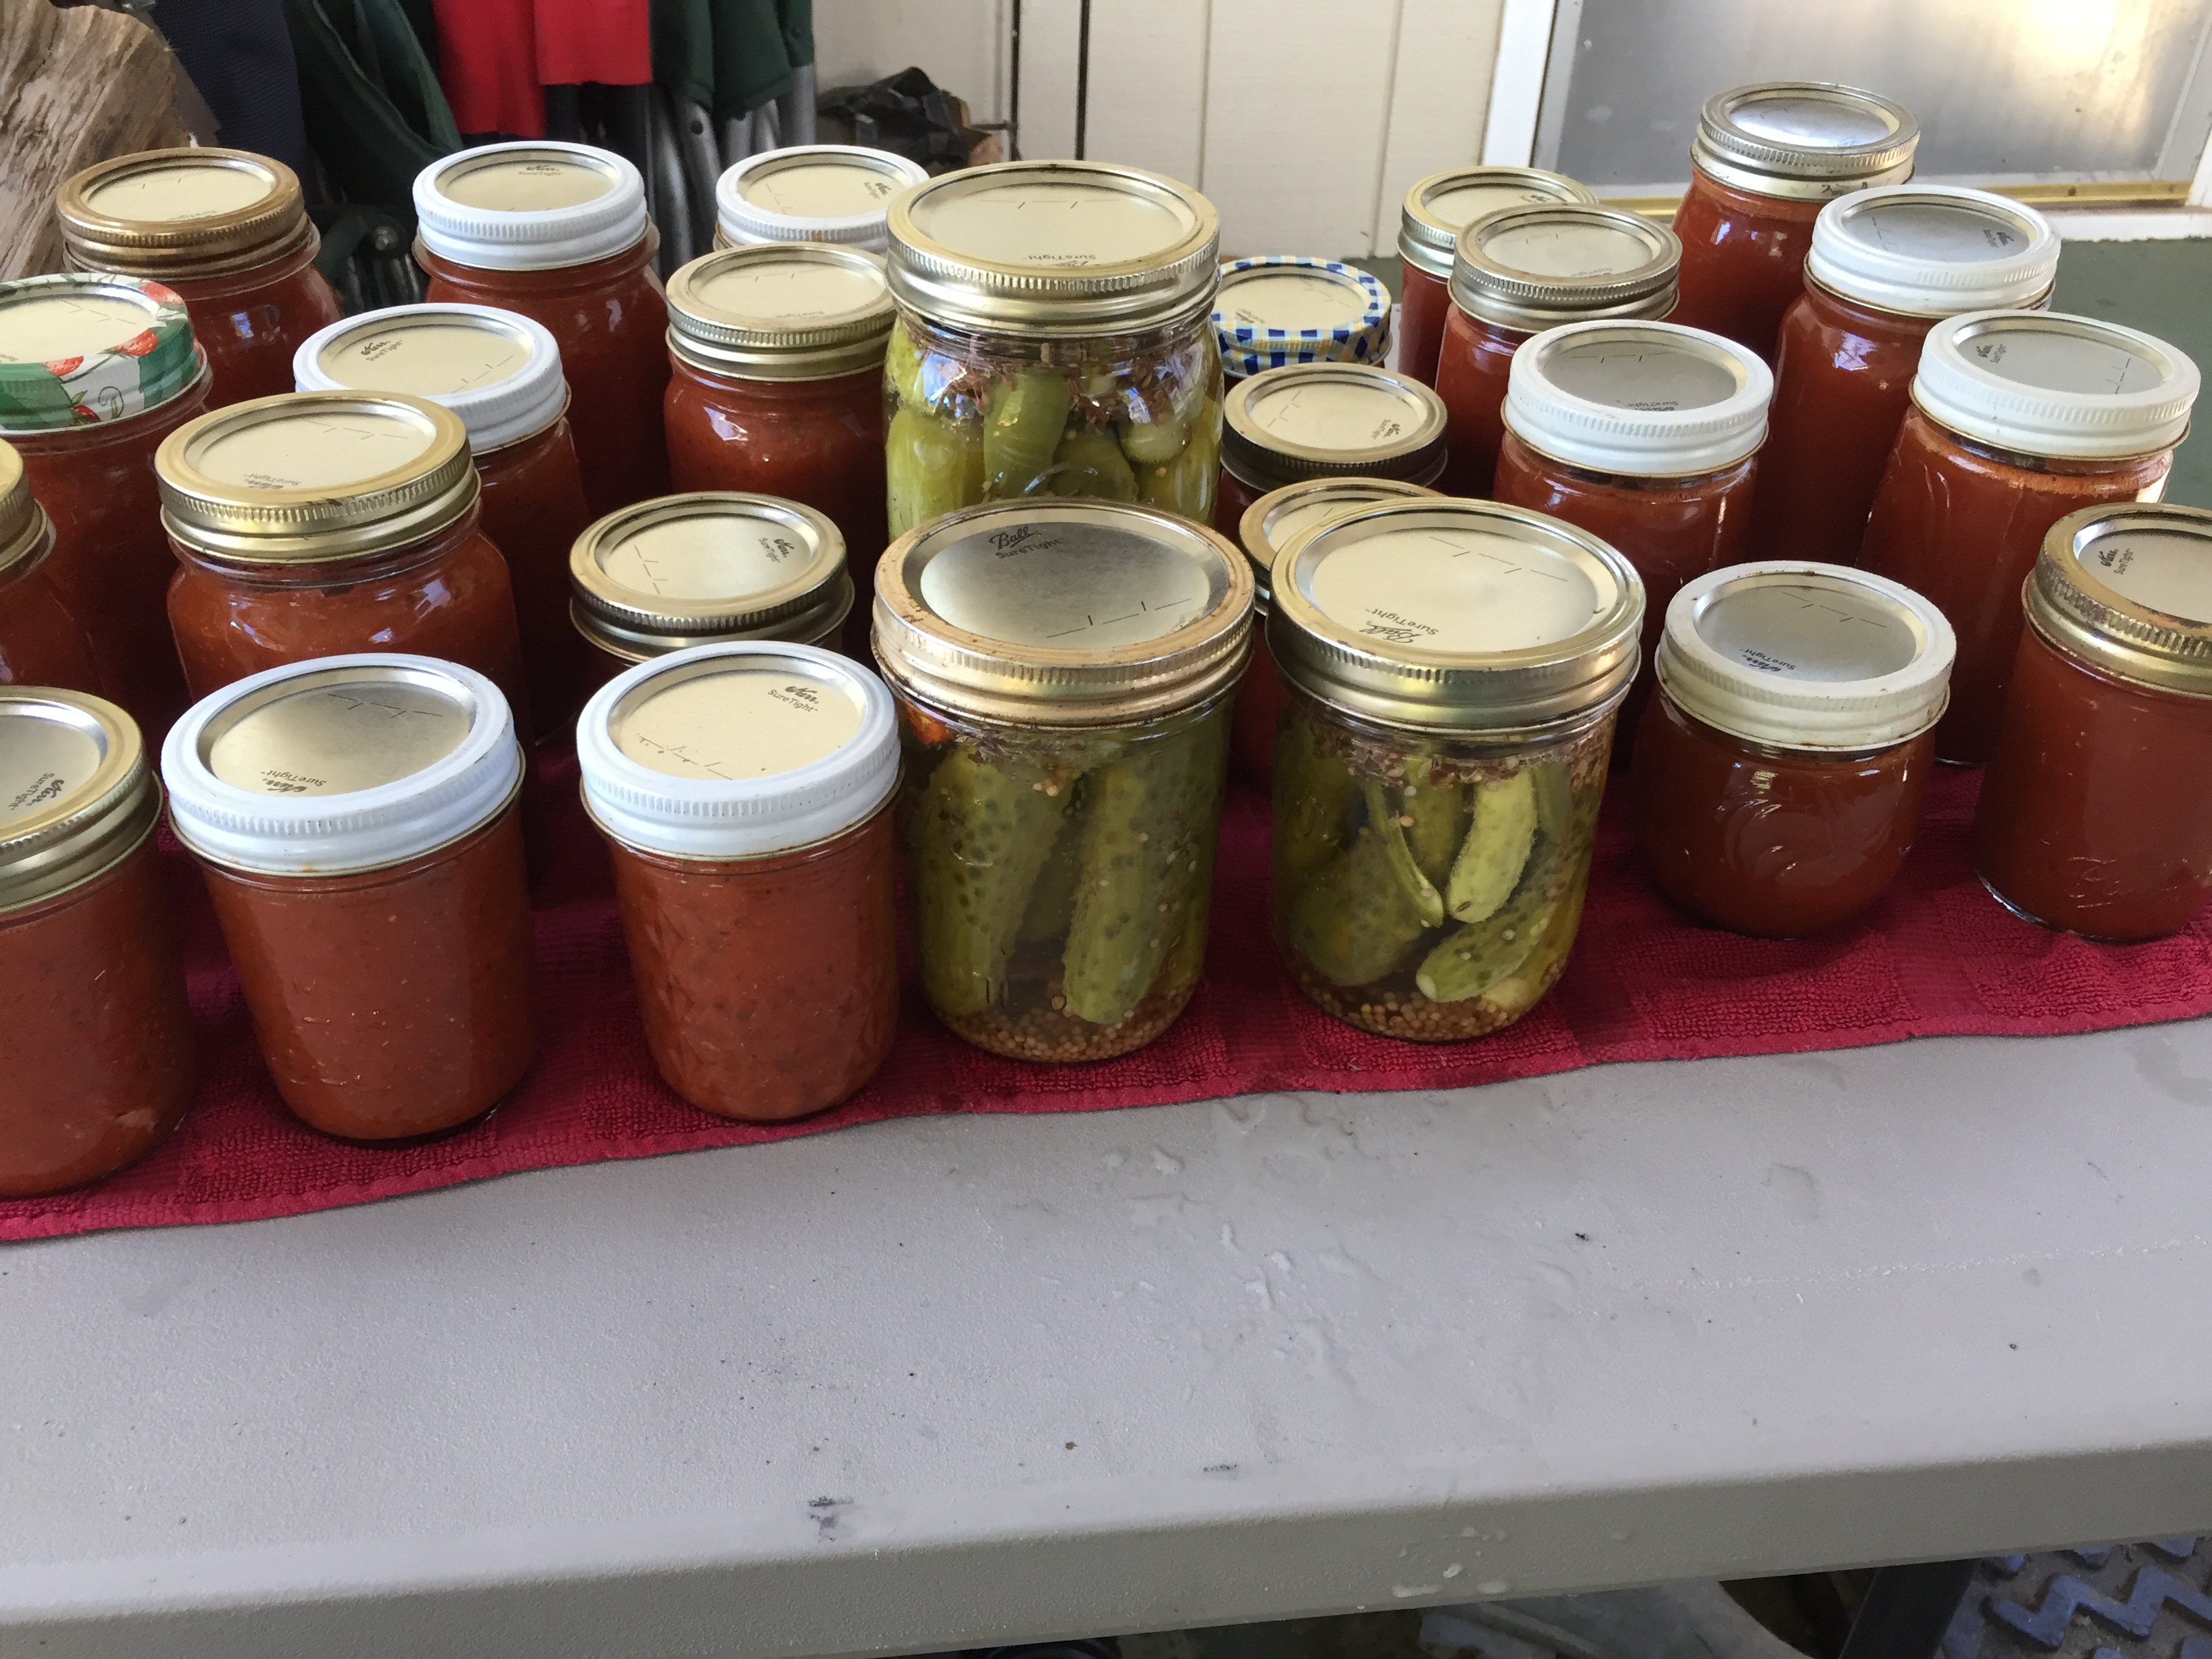
The 11 little jars on the right are the enchilada/taco sauce.  I was asked how I made it, and if it was a secret recipe.  The truth is, I am writing it down for my self as much as anyone else, because if time passes, it will be a secret–I won’t be able to remember what I did!

This is my second attempt at enchilada sauce this summer.  The first one was good, but we wanted a little more spice and a smoother texture.    My pamphlet from the county extension office states that you can change the spices without affecting the safety of the finished tomato product, but nothing else, so that’s what I did.

I took a large bowl of tomatoes and washed and cut them up.  Then, I put a layer of them in a pot on high and crushed them with a potato masher while they cooked.  When that layer was softened, I added more cut-up pieces and kept crushing and cooking until the pot was about 3/4 full.  You have to keep stirring, because this will stick and burn if you are not careful.  Then, I put these cooked tomatoes through my Foley Food Mill to get the seeds and skins out.  I put that puree back into the pot.  At this point, it was nice and smooth, mostly seed-free, but pretty runny.  I thickened it up with a combination of cooking it down and added some tomato paste until it was the consistency of taco sauce such as I would buy at the store.  Our favorite is La Victoria, and we usually get the mild, but sometimes the medium.

I used about 2 cups of paste in the large pot that was 3/4 full, but then it was too thick and so I had to add some water to thin it slightly.  If you are making this, the amount of paste you will need depends on several factors, which include the dryness of your tomatoes, the variety of the tomatoes, and the amount of time you cook the tomatoes down before you add the paste. Use trial and error until you reach the perfect consistency.  Each time you make it, it is likely to take a different amount because the tomatoes are so variable.  Taco sauce should be thicker than tomato juice, but not as thick as pizza/pasta sauce.  We buy our tomato paste for these kind of projects at Cash and Carry in the gallon cans.  I open the can, use what I need and then freeze the rest in baggies to use over time.  It is a real money-saver to purchase it that way instead of little cans for 50c-$1 each.  The last time we bought a can, it was slightly dented, and cost around $3, but it is usually a bit more than that.  Still a great deal.

This is my best guess at the spices I added to the pot:  1/4 cup mild chili powder, 2 Tablespoons dried oregano, 1 Tablespoon dried cilantro, 1 teaspoon garlic powder, 2 Tablespoons ground cumin, 1 Tablespoon salt, 2 teaspoons pepper, and 1/2 teaspoon – 1 teaspoon cayenne pepper.  The truth is, I was putting in spices, tasting, adding more spices, tasting, etc. until it tasted right to me.  The chili powder, oregano, etc. added an underlying layer of flavor but there was no zip at all, until I added the cayenne.  It is not very spicy, just enough to give a little kick.  When I make it again, I will start with this mixture, then add more of those same spices and/or salt if I don’t feel like there’s enough.

I put the hot mixture into the jars and added 1 Tablespoon lemon juice to each larger jar (not quite a pint) and 1/2 Tablespoon to the 1/2 pints.  Then, I canned it for 35 minutes in a hot water bath canner, as instructed in my Ball Blue Book for tomato sauce.

This yielded the 11 assorted jars in the right hand side of the picture above.  If I get enough tomatoes, I might make this again this year.  It turned out yummy and we are already opening and eating it:).  At this rate, it won’t take long to use up those 11 jars!

Zucchini Dill Chips

IMG_7553

I made zucchini dill chips today with the 8 more zucchini I picked this morning.  I picked them very small, so that should take care of the problem for a few days:)

I checked out a book at the library Wednesday called “Pickled Pantry” by Andrea Chesman.  The recipe I used was on page 116.

IMG_7549

I put about 4-1/2 + cups of zucchini slices in my big measuring cup and salted them according to the directions.  I used 1 Tablespoon salt, since it was about a double batch.  I let it sit about 5 hours.  There was a lot of water in the bottom of the container, and I dried the zucchini off as instructed.

IMG_7550

Then, I packed the zucchini and other ingredients into the jars.  (dill seed, garlic, dill head) I used 1/2 pints.  I added red pepper flakes because we like things spicy–probably about 1/8 teaspoon per jar.  I left the 1/2 teaspoon of sugar out.  I’ve had sugar in my dills before and don’t care for it.  I also added mustard seed, as I like that in dills–about 1/8-1/4 teaspoon per jar.  Then, the vinegar and water and the pickle crisp.

IMG_7552

I canned them according to the directions, which was 10 minutes.

It clearly states that you can make any dill recipe with zucchini.  Next time, I am going to make up my regular recipe of brine, minus the salt because you sprinkle that on the zucchini at first.  It seems like it would be easier to me.

We opened a jar already, even though it said to wait weeks.  I wanted to make more if they were good, and never make them again if not……They are amazing.  Even on the same day.  There is little crunch, a nice dill flavor, some heat from the red peppers….I’m making more for sure!   I got 5 small jars today.  The recipe is set up for small batches, which worked well for me.

There are lots of other good-looking recipes in the cookbook.  I’m not sure if I will make more or not, but this one was a winner.

Gluten-Free Cooking Day–Spring Break 2018

IMG_6537

Yesterday, I spent several hours cooking with a young friend of my niece.  She is only 17, and has been told by her doctor to stop eating gluten.  They also want her to eat only a small amount of dairy while they figure things out.  So, because they have not eaten this way before, her mom wasn’t sure what to make, and she wasn’t either.  So, she asked for a little help.  I love to cook, and never eat wheat, so jumped all over the opportunity.

The first thing we made was focaccia bread.  The recipe was from a book called “The Gluten-Free Bible” that I’ve had for several years.  They have you put zucchini and tomatoes on top, and sprinkle with Parmesan cheese.  She only put the tiniest bit of cheese on hers.  I put too many toppings on mine and it was a bit moist under the zucchini, but still good.  When I’ve made this in the past, I’ve focused on the cheese only, and have never put any tomatoes on it before.    It came out great, and we each had one when we were done.  We used the Pamela’s flour mix for bread for this one, and I sent enough home for her to make it again if she wants to.

IMG_6538

The second thing we made was lemon poppy-seed muffins, from the same cookbook.  I’ve made them before, and they turned out great, as usual.  We did not put glaze on them.  For these muffins, we used the Bob’s Red Mill 1-1 gluten-free flour blend.  Again, I sent home enough for her to make them again or to make another item.

The third thing we made was cookies from Gluten-Free and More magazine.  They were made using sunflower seed butter, cocoa powder, an egg, and some brown sugar.  Yum!  This was a new recipe that my friend had tried, and it was delicious, so I wanted to make it.

IMG_6539

Last, but not least, we made a masa crust for a taco pizza.  I got this recipe from Eating Well  magazine and tore it out a while back, but hadn’t tried it yet.  Basically, we mixed the 1-1/2 cup masa flour with 2 eggs, 1/2 cup water, 1 tsp.garlic powder, 1 tsp. Chile powder, 1/2 tsp. salt and 1/2 cup green onions and patted it out on parchment paper. Then, we baked that at 400 degrees for 10 minutes.  We fried up some hamburger with taco seasoning, and I took her home with her crust and taco burger and all her other food items from the day to eat as she wished.  Later, at our house, Rob spread refried beans, the meat and cheese on ours and put it back into the oven until it was warm and the cheese was melted.  Then, the recipe calls for taco toppings such as tomato, lettuce, salsa and avocado, but he just ate it plain.  When I got home from my errands, I had some and it was extremely good, even warmed up in the microwave (even cold) and we will make it again.

IMG_6540

It was fun to try some new recipes with Kim.   We talked about snacks that she could buy to take to school and how important it is to clean the counter of crumbs before she cooks and many other things.  There are so many good options available now that there is no need for anyone to feel deprived, but it’s just a matter of figuring out what works for each individual.   I anticipate that we may cook again another day!  When the day was done, I loved that I had dinner for us, and some goodies for a few days.  Now I’m on a roll and want to try some of the other recipes I found while planning for our cooking day.  No worries….Easter is Sunday and I will cook a couple of things for that.

Gluten-Free Double Chocolate Loaf Cake

IMG_5761

I’ve been asked for the recipe for the cake I made for my sister’s birthday last week.  It’s a recipe from an old cookbook that I altered to make gluten-free.  Here’s what I did:

1-1/2 cup butter

3 cups sugar

5 eggs

3 cups Bob’s Red Mill 1-1 gluten-free flour (this blend includes xanthum gum)

1/2 cup cocoa powder

1/2 teaspoon baking powder

1/2 teaspoon salt

1 cup milk

1 teaspoon vanilla

chocolate chips to sprinkle on top (I think I used about 1 cup)

Soften the butter.  Cream butter and sugar, add eggs.  Add the rest of the ingredients, except the chocolate chips and mix well.  (I did all of this in a bowl, with a spoon, but I’m sure a mixer could be used.)  Divide the mixture between 3 loaf pans that have been sprayed with non-stick spray.  (I’ve done it in 2 large loaf pans, or 3 slightly smaller ones, and feel it cooks better in the 3 slightly smaller ones.  I also made cupcakes from this recipe last spring–just cook for less time and leave the chocolate chips off or stir them in)  Sprinkle chocolate chips on top of the loaf cakes and bake them in a 350 degree oven for 1 hour-1 hour and 10 minutes or until firmed up and done in the center.  (The trick here is to get the center to cook without getting the edges too crisp or even burnt.)  Cool on a wire rack for 10 minutes, then turn out of the pans and finish cooling.  Makes 2 large loaves or 3 smaller ones.

IMG_5798

There are several things I like about this recipe.  First, it does not need frosting, so it is easy to transport. Second, it can be divided into the individual loaves so I can make a batch, use one loaf and freeze the rest for another day, which is a time-saver for me.  Third, it is gluten-free and tastes really good!  It can be “dressed up” for a party, or used for lunches.

If you don’t need to make gluten-free cake, it works well with regular flour.  I used to make it that way, years ago.  It is basically a chocolate pound cake with chocolate chips sprinkled on top.  When I modified the recipe, I did add more cocoa powder than the original recipe, because……chocolate cake, chocolate chips, chocolate candy bars….need I say more?  Enjoy!

IMG_5774

IMG_4635